Search This Blog
Thursday, September 29, 2011
Introduction to Lightroom and a number of features
Adobe Lightroom is the result of the community in luring a professional photographer with an entirely new way, which helps to remove fatigue with the features of the new tool designed specifically for you. Finally, we want Lightroom is a tool that trust is built from the photographer, and for photographers, the program helps you solve a string of the most challenging job.
Adobe Lightroom is built for professional photographers. This is a program of effective, powerful way to import, select, develop and demonstrate a large number of digital photos.
Adobe Lightroom will help you reduce time to organize and arrange the photos, so you have more time to shoot and make the photos become more perfect. Lightroom program aims to get direct feedback from the photography community, visit the Adobe Labs Web site so that you get a clearer view of what Adobe has done.
--------------------
Some features
Professional image editing with Adobe Photoshop Lightroom
TTO - Photoshop Lightroom is one of the editors, the most professional image processing today. Owning a variety of options available, Lightroom is very good support for those new to digital and post-processing techniques, much easier than when operating with Photoshop.
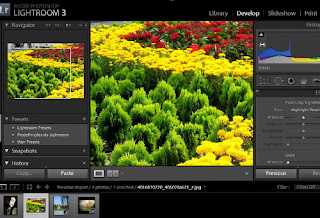
Adobe Lightroom interface
Note, the options below are made with RAW image formats. Among the modules of Lightroom, Develop is the central processing techniques. Library helps users to browse image data. Print to print. Slideshow help create Web presentations and publish images online.
You can refer to the 10 basic tips following treatment with Lightroom to convert original images into real works of marked individuals of the author. 1. Select the "Develop" to adjust the basic parameters common for photographs. Another tip is to increase the maximum density for the image by dragging the horizontal bar on the custom Black + 5 or more (In the Color section, choose the Basics). Customize This will make the image more alive.
2. You can add texture to the image by accessing Effect bar, select Post-Crop Vignetting. Choose the pattern to -15 to increase black tones for the picture angle, making the viewer will focus more on center. There is another option that you select the motifs + 15, will increase the angle of light, consistent with the scene or wedding flowers. This technique will increase the brightness, feeling bright light of the image space.
3. Graduated Filter using filters to change the composition of the image, creating selective regional effects. One of the options or the Graduated Filter is fairly exposure (Exposure) -33, then you hit the end of the image and drag the tool to the other half. This will create a platform for space below the image, the image more depth. (To access this tool, you look at the options icon in the bottom histogram, select the 4th icon from the left. When the operation is not satisfied, you simply click to select, then press Ctrl + Z to cancel last command performed).
4. In the Tone Curve panel customization, you can adjust the image's shadow. Shadows and Darks choose to -10 to + 10 to increase the crispness of the image, and add subtle contrast on the entire image.
5. You can reduce the color of the sky, the images are too bright by adjusting the brightness. Click the HSL contains parameters, select the luminance. Then select Adjust bar on the left, which leads to the same location on the sky in the image and drag down. This will help more natural picture, green sky.
6. The black and white photographs have captured the hearts of many. Lightroom has the tools available to convert from color to black and white photos with just one click. You can also perform this conversion yourself, just to add some effects by adjusting the Vibrance and Saturation. In the Basic panel, choose the Vibrance and Saturation at -75. Export files will look like black and white but still retains a bit of color, creating interesting effects. The black and white photographs often have more contrast, so sharpen your Clarity from 50 to 70.
7. Use of clarity (in the Basic panel) to adjust the face tone. To add a little stronger, you can increase the custom, by contrast, want to make the skin soft, reduce clarity!
8. You can add to the mottled grain to the image, to create a work style of an ancient image. To do this, you into Effect bar, select Grant and increased 5 or 10 points.
9. If you want to create a vivid images that do not want their kids home in the skin sunburn, remember to increase higher Vibrance Saturation. Vibrance mainly called two-tone green and blue, while Saturation tends to select reds and yellows. If you increase the Saturation higher Vibrance, the skin will be tan. Vibrance rate should be chosen higher than 2-3 times Saturation.
10. To process your portrait, choose Spot Removal to smooth the face of evil. Choose the parameters of the Healing brush tool, instead of the clone, to speed, better results. Note, the option is 80% better than 100% to clean up the bad facial features, but retains original features.
Subscribe to:
Post Comments (Atom)


No comments:
Post a Comment